

10 x 30 tent instructions
Understanding a 10×30 tent’s assembly is crucial for successful events, offering a spacious shelter for various gatherings and celebrations.
Detailed guides, like those found online, demonstrate the process from laying out frame parts to securing the fabric, ensuring a stable structure.
These tents are frequently used for weddings, parties, and commercial events, requiring careful attention to setup instructions for optimal performance.
Reviewing assembly instructions, user manuals, and video tutorials will greatly assist in a smooth and efficient tent setup experience, maximizing usability.
What is a 10×30 Tent?
A 10×30 tent refers to a temporary shelter measuring ten feet by thirty feet, commonly utilized for outdoor events and providing substantial covered space. These tents are typically sectional, meaning they are constructed from multiple interconnected frame parts, offering flexibility and portability.
Often constructed with a durable frame – usually steel – and a waterproof fabric canopy, a 10×30 tent is designed to withstand various weather conditions. Assembly requires following specific instructions, often detailed in a user manual, to ensure structural integrity and safety.
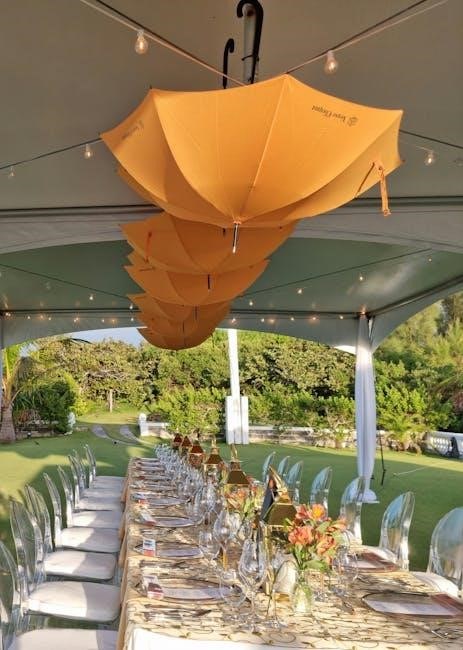
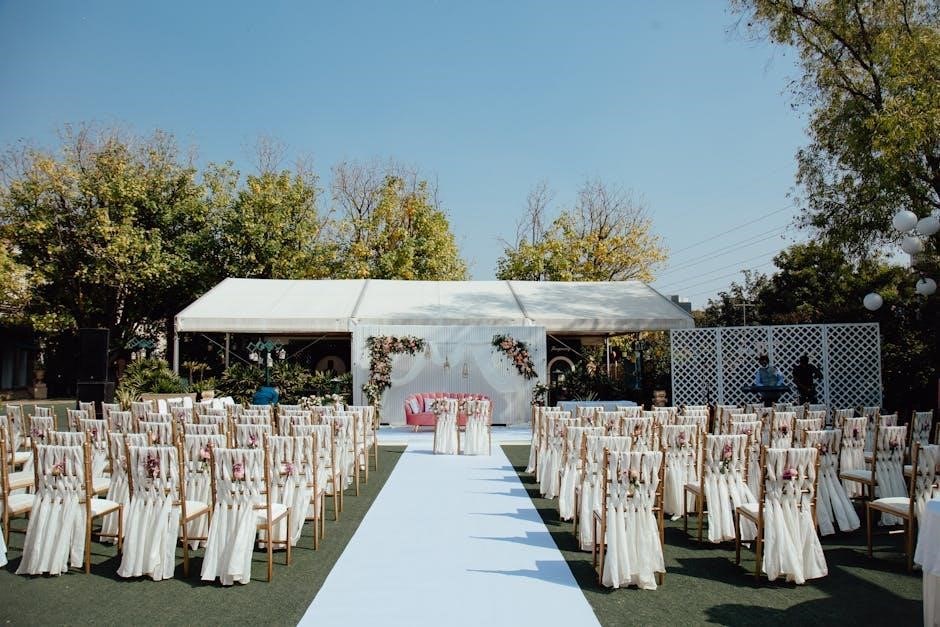
The size is ideal for accommodating a moderate number of guests, tables, or equipment, making it popular for weddings, parties, vendor booths, and other outdoor functions. Understanding the components and proper setup procedures, as highlighted in online guides, is essential for a successful event.
Common Uses for a 10×30 Tent
The versatility of a 10×30 tent makes it suitable for a wide array of applications, primarily centered around providing sheltered space for outdoor gatherings. A frequent use is for wedding receptions, offering an elegant and protected area for dining and dancing.
These tents are also popular for parties of various sizes, from intimate celebrations to larger events, shielding guests from sun and rain. Commercial applications include vendor booths at festivals and markets, providing a dedicated space for displaying goods.
Furthermore, 10×30 tents serve as temporary shelters for outdoor events like concerts or sporting events, and can even be utilized for storage purposes. Proper setup, guided by available instructions and manuals, ensures safe and effective use for any occasion.
Tent Components and Parts List

A standard 10×30 tent includes frame poles, durable tent fabric for the top and sidewalls, and essential fasteners like clips, bungees, and Velcro.
Frame Poles (Legs, Braces, Roof Rails)
The frame of a 10×30 tent typically consists of several interconnected poles, categorized into legs, braces, and roof rails, crucial for structural integrity.
Legs provide the vertical support, determining the tent’s height, while braces offer stability, preventing swaying or collapsing, especially in windy conditions.
Roof rails, running horizontally, form the tent’s upper structure, supporting the fabric canopy and distributing weight evenly across the frame.
These poles are often made of steel or aluminum, balancing strength and weight; proper connection of these sections is vital, as highlighted in assembly guides.
Understanding the function of each pole type and following the manufacturer’s instructions for assembly ensures a safe and robust tent structure, ready for use.
Careful inspection for damage before setup is also recommended.
Tent Fabric (Top, Sidewalls)
The tent fabric comprises the top, or canopy, and sidewalls, providing weather protection and enclosure for a 10×30 tent structure.
Typically made from polyethylene or vinyl-coated polyester, the fabric is designed to be waterproof and durable, resisting tears and UV damage.
The top section covers the frame, creating the roof, while sidewalls attach to the frame’s sides, offering varying degrees of enclosure – fully closed or open-sided.
Attachment methods include clips, Velcro, or ties, securing the fabric tightly to the frame to prevent flapping in the wind, as demonstrated in setup guides.
Proper fabric tension is essential for a neat appearance and structural stability; regular cleaning maintains the fabric’s integrity and lifespan.
Consider the fabric weight and material when choosing a tent for specific weather conditions.
Fasteners (Clips, Bungees, Velcro)
Securely attaching the tent fabric to the frame relies heavily on various fasteners, including clips, bungees, and Velcro straps.
Clips, often plastic or metal, hook onto both the fabric and frame, providing a quick and adjustable connection point throughout the tent structure.
Bungees offer elasticity, helping to maintain tension and prevent fabric sagging, particularly on the roof and along sidewall edges.
Velcro straps are commonly used for sidewall attachments, allowing for easy removal or reconfiguration of the tent’s enclosure.
These fasteners are crucial for withstanding wind and ensuring the tent remains stable during use, as highlighted in assembly instructions.
Regularly inspect these components for wear and tear, replacing damaged fasteners to maintain the tent’s structural integrity.

Safety Precautions Before Setup
Prioritize a level, obstacle-free site, considering potential wind and rain impacts; review warnings in the manual for safe tent installation.
Site Selection (Level Ground, Obstacles)
Choosing the right location is paramount for a safe and stable 10×30 tent setup. Begin by thoroughly inspecting the ground for levelness; even slight inclines can compromise structural integrity and create hazards.
Remove all obstacles – rocks, roots, branches, and debris – that could puncture the tent fabric or impede stake penetration. Underground utilities are a serious concern; always check for buried lines before driving stakes into the ground.
Avoid areas prone to water accumulation, as this can lead to pooling and potential collapse. Consider proximity to trees, ensuring branches won’t fall onto the tent during inclement weather.
Adequate space around the tent is essential for guy lines and safe access; A well-chosen site minimizes risks and maximizes the tent’s usability and longevity.
Weather Considerations (Wind, Rain)
Before erecting your 10×30 tent, carefully assess the anticipated weather conditions. Wind is a significant factor; always secure the tent with robust stakes and guy lines, especially in exposed areas. Reinforce sidewalls to prevent flapping and potential damage.
Monitor weather forecasts closely and be prepared to disassemble the tent if severe winds are predicted. Rain can create slippery surfaces and add substantial weight to the fabric, potentially causing collapse.
Ensure proper drainage around the tent to prevent water pooling. Consider using a groundsheet to protect the tent floor from moisture.
Regularly inspect the tent during inclement weather, checking stake security and fabric tension. Prioritizing weather preparedness ensures a safe and enjoyable event.
Step-by-Step Tent Assembly Guide
Begin by carefully unpacking all components and referencing the included instructions; laying out the frame is the initial crucial step for efficient assembly.
Laying Out the Frame
Before commencing assembly, designate a spacious, clear area slightly larger than the tent’s 10×30 footprint. Unpack all frame components – legs, braces, and roof rails – and organize them for easy access.
Begin by laying out the base legs, forming the rectangular perimeter of the tent. Ensure the legs are oriented correctly, noting any specific markings or connectors. Next, position the corner braces, connecting the legs at each corner to establish initial stability.
Subsequently, lay out the roof rails along the length and width of the frame, preparing for their attachment to the upright legs and braces. Double-check that all parts are present and accounted for, referencing the parts list in the instruction manual. A methodical layout significantly streamlines the subsequent assembly process, preventing frustration and ensuring structural integrity.
Assembling the Frame Sections
With the frame components laid out, begin connecting the legs to the corner braces using the provided connectors – often push-button or clip-in mechanisms. Ensure a secure and flush connection at each corner, verifying stability as you progress.
Next, attach the roof rails to the assembled leg and brace sections. This typically involves inserting the rails into designated slots or securing them with clamps. Work systematically, moving along the length and width of the tent frame.
Pay close attention to the alignment of the rails, ensuring they are level and evenly supported. If encountering resistance, double-check the connector orientation and apply gentle, even pressure. A fully assembled frame should stand securely, forming the foundational structure for the tent fabric.
Attaching the Tent Fabric
Once the frame is fully assembled, carefully drape the tent fabric over the structure, starting with the top section. Align the fabric edges with the frame, ensuring even coverage and minimal slack.
Secure the fabric to the frame using the provided clips, bungees, or Velcro straps. Begin at the corners and work your way around the perimeter, spacing the fasteners evenly to distribute tension.
Pay attention to any designated markings on the fabric, which may indicate specific attachment points or orientation. Ensure the fabric is taut but not overly stretched, avoiding wrinkles or tears. A properly attached fabric cover will create a waterproof and secure enclosure.

Securing the Tent
Utilizing tent stakes and ropes is vital for stability, especially against wind. Proper placement, angled away from the tent, maximizes holding power and safety.
Using Tent Stakes and Ropes
Securing a 10×30 tent effectively requires a strategic approach to staking and roping. Begin by inserting heavy-duty tent stakes at a 45-degree angle, pointing away from the tent itself, to maximize ground grip. Utilize all available stake points, especially at corners and along sidewall edges.
Ropes, often included in tent packages, should be attached to the tent’s designated rope loops. Extend the ropes tautly and secure them to the stakes, ensuring even tension across the entire structure. Adjust rope tightness as needed to counteract any slack or unevenness.
For enhanced stability in windy conditions, consider using longer stakes or additional ropes for diagonal bracing. Regularly inspect stakes and ropes throughout the event to confirm they remain firmly anchored, preventing potential tent collapse or shifting.
Proper Stake Placement Techniques
Optimal stake placement is paramount for a secure 10×30 tent setup. Avoid driving stakes directly into hard, rocky ground; instead, seek softer soil or pre-drill holes if necessary. Position stakes at a 45-degree angle, angling away from the tent, to resist pull-out forces effectively.
Space stakes evenly around the tent perimeter, prioritizing corners and points where ropes attach. When using ropes, ensure they are taut and create a triangular shape with the stake and tent attachment point. This distributes tension and enhances stability.
For extra security, especially in windy conditions, consider doubling up stakes at critical points or using longer, heavier-duty stakes; Regularly check stake positions throughout the event, re-adjusting as needed to maintain a firm hold and prevent shifting.
Sidewall Installation and Options

Attaching sidewalls to the tent frame provides enclosure and protection, offering configurations like fully closed for privacy or open-sided for ventilation.
Securely fasten sidewalls using clips, Velcro, or ties, ensuring a snug fit to prevent flapping in windy conditions, enhancing overall tent functionality.
Attaching Sidewalls to the Frame
Successfully attaching sidewalls to your 10×30 tent frame is vital for creating a fully enclosed and protected space. Begin by carefully aligning the sidewall edges with the tent frame’s vertical poles, ensuring a proper overlap for secure fastening.
Most sidewalls utilize a combination of attachment methods, including durable clips, strong Velcro strips, or tie-down ropes. Start at a corner and systematically work your way along the frame, spacing the fasteners evenly to distribute tension and prevent sagging.
Pay close attention to the orientation of the sidewall, ensuring any doors or windows are positioned as desired. Tighten all fasteners firmly, but avoid over-tightening, which could damage the fabric or frame. Regularly inspect the connections, especially in windy conditions, to maintain a secure enclosure.
Proper sidewall attachment significantly enhances the tent’s ability to shield against the elements and provide privacy for your event.
Sidewall Configurations (Open, Closed)
A key benefit of 10×30 tents is the flexibility in sidewall configurations, adapting to diverse event needs and weather conditions. A fully closed configuration, with all sidewalls secured, provides maximum protection from wind, rain, and sun, creating a completely enclosed space.
Conversely, an open configuration, with sidewalls partially or fully removed, offers increased ventilation and an unobstructed view, ideal for warmer weather or events desiring a more open atmosphere. Sidewalls can be rolled up, tied back, or completely detached, depending on the attachment system.
Partial configurations, such as removing sidewalls on one side, allow for controlled airflow and access points. Consider the event’s purpose and anticipated weather when choosing a configuration, prioritizing guest comfort and safety. Regularly check sidewall security, especially during transitions between configurations.

Troubleshooting Common Setup Issues
Addressing frame pole connection problems and fabric attachment difficulties is common during setup; review instructions and ensure proper alignment for a secure tent.
Frame Pole Connection Problems
Encountering difficulties connecting frame poles is a frequent issue during 10×30 tent setup. Often, this stems from misaligned sections or forceful attempts to join incompatible parts. Carefully examine the pole ends, ensuring they are correctly oriented for insertion – some poles may have designated ‘top’ or ‘bottom’ markings.
If poles resist connection, avoid excessive force, which can cause bending or breakage. Instead, slightly loosen adjacent connections to allow for greater flexibility. Double-check the instruction manual for specific pole assembly sequences, as incorrect order can hinder proper fitting.
Lubricating the connection points with a silicone-based spray can also ease assembly. If a connector is damaged, it’s crucial to replace it before proceeding to maintain structural integrity. Remember, a secure frame is paramount for tent stability and safety.
Fabric Attachment Difficulties
Attaching the tent fabric to the frame can present challenges, often involving issues with clips, Velcro, or bungee cords. Ensure the fabric is properly aligned with the frame before attempting attachment, stretching it evenly to avoid wrinkles or strain. If using clips, verify they are securely fastened to both the fabric and frame poles.
Velcro attachments may require firm pressure for a strong hold; inspect the Velcro strips for debris that could impede adhesion. Bungee cords should be stretched to an appropriate tension, securing the fabric without overextending them.
If the fabric seems too small, double-check that the frame is fully assembled and at the correct dimensions. Review the setup guide for specific fabric attachment points and techniques, ensuring a taut and weatherproof covering.

Tent Maintenance and Care
Regular cleaning of the tent fabric and proper storage of frame poles are essential for longevity, preserving its condition for future events and uses.
Cleaning the Tent Fabric
Maintaining the tent fabric’s integrity is vital for its lifespan and performance. After each use, inspect the fabric for dirt, debris, and mildew, addressing issues promptly to prevent lasting damage.
Gentle cleaning is key; avoid harsh chemicals or abrasive cleaners that can compromise the material’s waterproof coating. A mild soap solution and a soft brush or sponge are recommended for effective cleaning.
Rinse thoroughly with clean water, ensuring no soap residue remains, as this can attract dirt and promote mildew growth. Allow the fabric to air dry completely before storing, preventing moisture buildup and potential damage.
For stubborn stains, consult the tent’s user manual for specific cleaning recommendations. Regular cleaning and proper drying will significantly extend the life of your 10×30 tent fabric, ensuring it remains ready for future events.
Frame Pole Storage
Proper storage of the tent’s frame poles is crucial for maintaining their structural integrity and preventing damage during off-season periods. Before storing, ensure all poles are completely dry to avoid rust or corrosion.
Disassemble the frame completely, separating legs, braces, and roof rails for easier handling and storage. Organize the poles neatly, bundling them together with straps or rope to prevent them from becoming tangled or scattered.
Store the frame poles in a dry, sheltered location, away from direct sunlight and extreme temperatures. A garage, shed, or storage unit are ideal options. Avoid stacking heavy objects on top of the poles, as this could cause bending or breakage.
Regular inspection during storage can identify potential issues early on, ensuring your 10×30 tent frame remains in optimal condition for years to come.